Pages

Monday, May 19, 2014

Shower Crafts I have made for gifts

Making something is one way to say 'I love you'. So whenever I have a chance, I like to make gifts. This is ALWAYS the case with baby showers and bridal showers. Occasionally, if I know a Mommy-to-be needs help, I will buy something off of her registry as well. But everyone loves a hand made gift! Here are some shower gifts I have made in the past...
 
 
For my own baby shower, we used a pastel butterflies theme and I made this Butterfly Diaper Cake! I used over 100 size 1 diapers, tulle, baby socks, flowers and ribbon as well as some hand painted nylon butterflies I made. This picture has been getting repined like crazy on Pinterest. At the time this post was written it was at 127 repins and it is being pinned about 3 times a day!  I also used a smaller version of the butterflies in my daughters nursery.. I am working on a tutorial for how to make them that I will hopefully post in the near future so check back for it!

 
I also made smaller versions of the diaper cake for each table. Diaper Cupcake Table Centerpieces!
so cute...

 
Each Diaper cake is topped with a baby sock flower arrangement!

 
I also made a Baby Sock Flower Bouquet as a baby shower gift for a special mommy-to-be!
 
 
little baby sock flowers are just so sweet! I learned a little about how to make these from a video by Martha Stewart and combined the techniques with some of my floral crafting skills.

 
Then I started making Diaper Wreaths. They were such a big hit and so much easier to transport and carry into the party.
 
 
I used a hooded towel as the center for this Blue and Green Diaper Wreath for a baby boy! The Mommy has told me it is still hanging in the boys room even though he is about 5 years old now!

 
I also like to use a cuddly stuffed animal blanket for a center like I did with this Pink and Purple Diaper Wreath for a baby girl. Then I embellish them with little toys, rattles, teethers or rubber ducks are perfect! I also like to buy the little Johnson & Johnson sampler box and attach the tiny bottles of shampoo or lotions to the wreath.

 
Sometimes I get lucky and I find a few cute little plushies or bath squirters that match the theme or color like I used with this Winnie the Pooh Diaper Wreath! Then I tie each diaper and each little toy with curling ribbon and curl each and every piece!
 
I don't remember what tutorial I learned to make these from but here is a good example of one for anyone who wants to learn how they are made. This diaper wreath tutorial most resembles the wreaths I make. You can use most anything for the circle. I have used several different things and I prefer the styrofoam circle the best! I always use size 1 diapers.
 
For bridal showers, I do a different version of a cake. The Towel cake! They are especially appropriate for bridal showers because they resemble wedding cakes! When a bride-to-be shares their registry information, the first thing I look for is towels! I buy whatever towel they have on their registry and I revolve the theme of my cake around their color!


For this Blue and Silver Towel Cake, the bride and groom had teal and grey towels on their registry. Some of the towels were solid colored and some were striped so I bought a few of each and made this beautiful towel cake! I especially loved the topper I made with flowers and ribbons that matched the towels!


I also made a Fall Towel Cake for a bridal shower I threw for my best friend. She did not make a registry but I bought her some brown towels that really made the fall leaves and flowers pop off this bridal shower decoration!
 
 
I sometimes like to make little Kitchen Towel Cakes for housewarming gifts as well. Instead of bath towels and hand rags like the shower cakes, they use kitchen hand towels and dish rags! I made this one for a family member of mine who had not yet decided what color her kitchen was going to be decorated. I embellished it with gripper pads that I rolled into flower shapes and some kitchen utensils. Hidden inside was a small can of coffee and a little bottle of creamer!


When my cousin had her housewarming party in late fall, I got a discounted scarecrow in a flower pot decoration and some garland with gourds and pinecones that I used to embellish this towel cake. Hidden inside of it was also a canister of candy corn!


I don't think anyone makes towel cakes quite the way I do, so I will have to post in the future about how I make them the next time I get to make one! Hope this post gives you lots of ideas for future shower gifts you can make yourself :)


Thursday, May 15, 2014

Blue and Brown Granny Square Afghan Finished!!

I finally finished my granny square afghan ! It took me 40 hours or so to complete it over the course of two months! It feels like such an accomplishment to finish one! My aunt loves it, she says "It's beautiful and matches my living room perfectly!"  ...Makes it worth every hour I spent working on it!!
 
 
Check out my post about how I began this project for type of yarn and colors used.
I just love the randomized layout of the squares! I'll let you know a secret, it was less random and more planned out than you might think! I started out by making an equal number of squares in each color, but after I had made about 2/3rds of the squares I would need, I spaced them out on the floor to check how the layout would look. I actually made a LOT more tan squares than colored squares so as to spread the color out nicely without making it look like a checkerboard. I filled in most of the blank spaces in this photo with tan colored squares :
 
 
I attached the squares together using a slip stitch method. In the past I have always sewed my squares together with a yarn needle, but I really like the dimension that slip stitch joining adds to the blanket.

 
You can see the raised edges around each square better in this picture:

 
I made 88 squares total for this blanket to get the size I wanted. The finished size is  45"x61" actually a little bigger than the size I was going for! :)


Friday, May 2, 2014

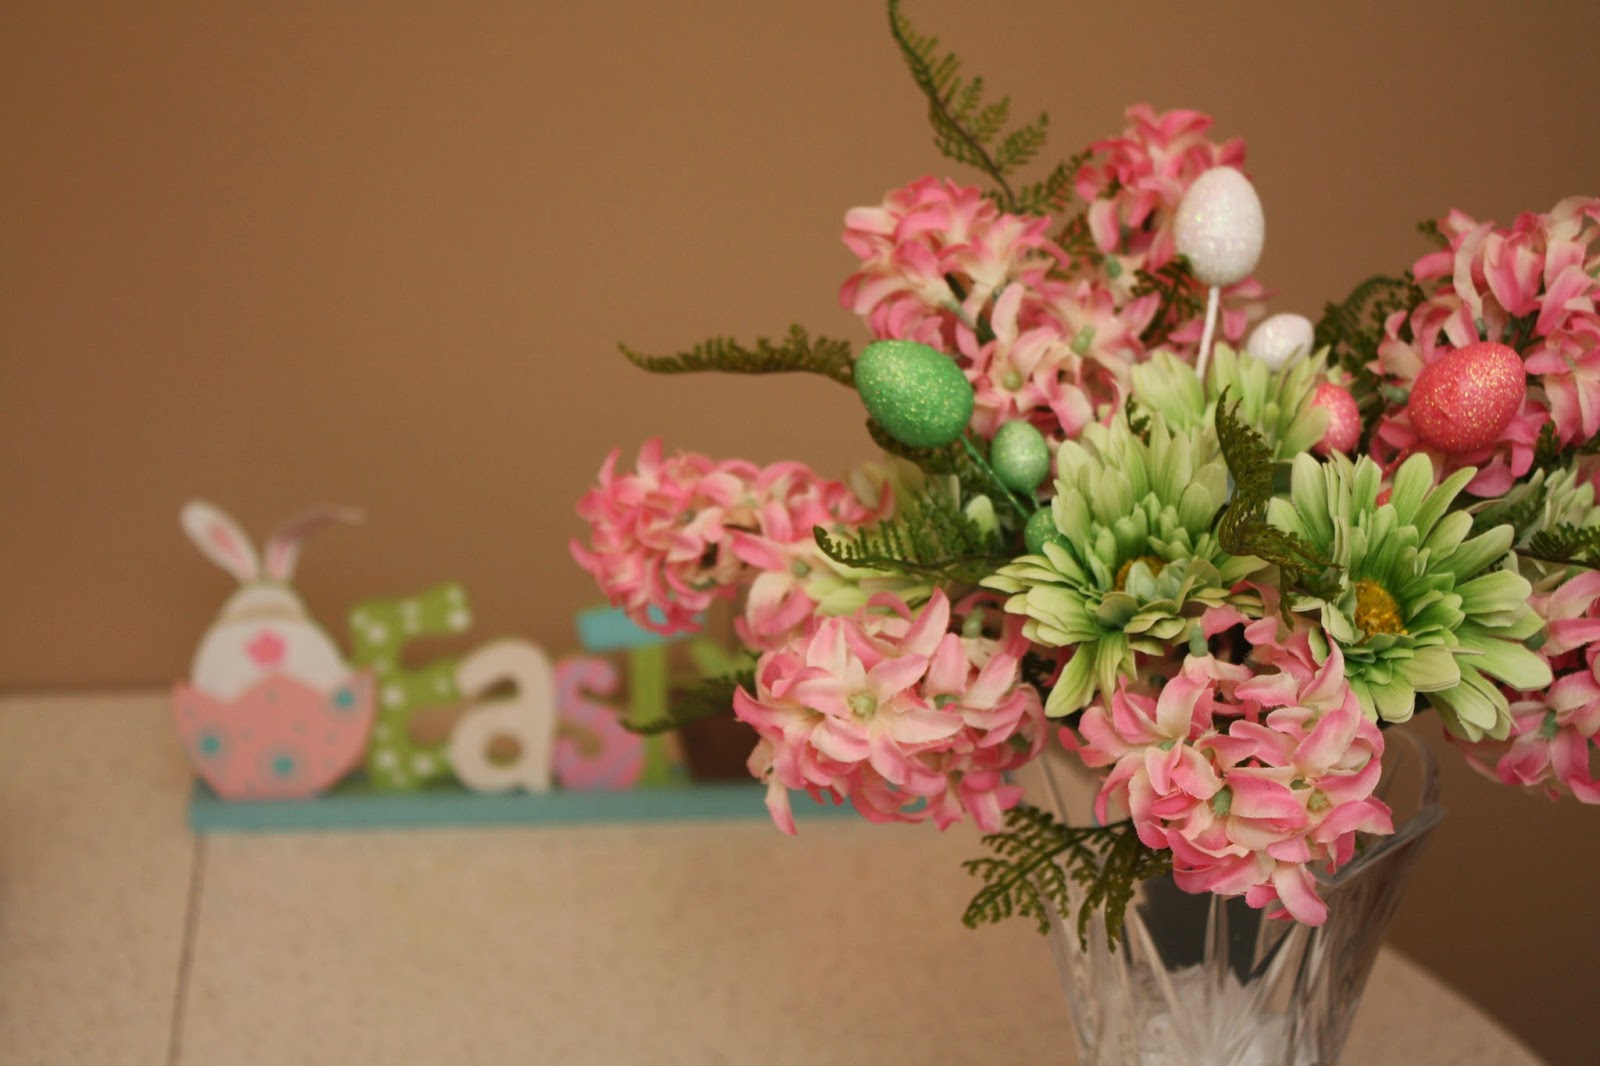
Easter / Spring Decor

Now that I have been married for nearly 7 years and owned my home for 4 years, I finally decided to get some Easter/Spring décor! I fell in love with this Easter sign at Pat Catans and decided it would be the inspiration for all of my spring decorations!
 
 
I also picked up some flowers and these little foam glittered eggs for an arrangement.

 
I wanted my floral arrangement to match the Easter sign, so the yellow had to go! I just painted right over it with white acrylic paint and sprinkled glitter on before it dried. I went over it with mod podge to keep the glitter from flaking off.

 
I also decorated some larger foam eggs. I got these at Pat Catans as well and I just painted them with acrylic paint I had mixed to match the colors in the Easter sign. I sprinkled coordinating glitter on each color as I painted, let each color dry before I painted the next color. It dried really fast! By the time I was finished adding a color to one egg, the other one was dry and ready for its next color.

 
The arrangement looks great with the sign. I especially love the polka dotted eggs!

 
I did not tape the larger foam eggs into the arrangement. I left them separate so they can be removed after Easter and the arrangement can be displayed in my home throughout spring and summer!

 
The little foam eggs are taped into the arrangement, but I like the sparkle and they are less subtle than the larger spotted eggs I made.


Next up for spring décor: A wreath for my front door! :)


Thursday, April 17, 2014

Brown and Blue Granny Square Afghan for Mothers Day

I have a family member who has been asking me for as long as I have been crocheting to make her an afghan. I learned to crochet at age 9 so lets just say it has been a long time!! I never got around to it, but then her daughter asked me to make her one for Mothers Day and I got to work! She wanted brown and blue but I don't like to make 2 color blankets- especially with squares because they always just look like checkerboards to me! So we decided on blue, brown and tan, but I am using 2 shades of blue to add more variety of color to it.
 
I used Caron Simply Soft in Bone, Country Blue, Dark Country Blue, and Chocolate and a size H hook.
 
I decided to use the granny square for this blanket. I wanted the blanket I make for this person to be traditional, so what better choice than the granny square? I don't know what it is about the granny square... its a classic. So easy to work up and so clean and neat.
 
 
It starts out just a tiny little square and before you know it- its finished!
 
 
I decided to work a border around each square in tan, so tan will be the main color of the blanket with pops of color from the blue and brown squares.
 
 
I think the colors look great together!
 
 
Each square is 5.5" wide and I am shooting for a 40" x 60" size blanket. I have made many baby blankets but I have yet to make an adult size blanket! According to my math, (or my calculator I should say) I would need 8 squares across and 11 squares down to reach my desired width and height. 
 
 
19 squares down!!
 
 
at least 69 more to go...... :)
 
Check out my post about finishing this project to see how it turned out!!


Thursday, April 10, 2014

Tangled Birthday party!

My daughter LOVES the movie Tangled! I showed her a picture of a tower on a birthday cake and that was it- she wanted a Tangled birthday party!!
 
 
Now I am not one to buy licensed birthday party sets- instead, I craft anything I can to make a party special and bring the theme to life! I found a bunch of ideas online as well and recreated them!
 
 
The first thing I did was make these little Pascal party blowers. Pascal is Rapunzel’s funny little chameleon friend. My little girl just loved them and we had a good time making them together.
 
I used this tutorial to make them. When they say a permanent marker works best- they are not kidding, if you make these use a Sharpie!! Non permanent markers will rub right off the foam.

Our favorite part of the movie is when Rapunzel finally sees the floating lanterns in the sky. So, of course, I had to make some for her party!
 
I saw a few pictures on pinterest of this type of decoration. Most of them were either with the star printed on the paper or with a paper star cut out and glued to the paper lantern. I decided to paint the stars right on the paper. Before the paint dried, I even sprinkled some glitter on so they would sparkle! Little girls love glitter!!

Then I just rolled the paper and stapled it into place. I used a hole punch to make holes to feed a ribbon through. I also hung command strips on the ceiling to hang the ribbon from. I LOVE Command strips!! I use them for a lot of my temporary decorations!

I also saw an idea online of a Tangled party game called “Pin the frying pan on Flynn Rider” I thought this was clever since Rapunzel uses a frying pan as a weapon in the movie. Flynn is always making a big deal about his “wanted” poster, so that was the perfect thing to use as the picture!

 
There are downloadable files available online that you can print of this image, but I wanted mine to be really big and I didn’t want to pay for a large print, so I just drew it and went over it with a Sharpie. I used my Silhouette electronic cutting tool to cut frying pan shapes out of black cardstock and I wrote the names of each kid on the handle. This was a good way to make sure all the kids at the party got to play the game, even if they ran off somewhere! Plus it was a cute touch!
 
 
I used Elmer’s Painters opaque paint markers to write the names. I used the sherbet swirl colors, they really popped on the black paper and almost looked neon.
I drew a faint outline of a frying pan in the center of the picture as a guide for the winning pan!
 
 
I also used my silhouette to make a happy birthday sign. I have made several happy birthday signs in the past and this was the nicest and easiest one I have made ! I am really good at eyeballing when it comes to making straight rows and even spaces so it was easy for me anyways…

 
I also made a braided hair decoration for the party. It was very easy but it was a pain because the yarn kept getting knotted up as I braided it. I am very good with yarn. I crochet and I am used to getting knots out of yarn. It turned out pretty cute though so it was worth it!
 
 
For the cake I just made my own and decorated it to have some simple flowers and a tower like a picture I saw online, except I stacked bigger donuts to make the tower so it would be less likely to fall over!
 
 
I stuck a dowel rod into the cake and stacked the donuts around the rod. I cut little holes into the cupcake papers so the dowel would go through and topped it with a sugar cone covered in icing! I am nowhere near a professional cake decorator. I have a few years’ experience decorating ice cream cakes at Brusters, so I know how to pipe flowers and leaves, and scribble a “happy birthday”, but that’s about it!! One of the party guests surprised me at the last minute with a Tangled cake topper (something else I NEVER buy for parties- cake toppers!)
 
 
My daughter already had a Tangled dress up outfit that she got for Christmas, so I had her wear it for the party. I knew she would want to take it off once she started playing with all the other kids though, so I put together another outfit for her to wear (and I had this in mind for her third birthday pictures) and she wore it under her dress.
 
I bought her a yellow skirt and a purple T-shirt for $4 and I made a T-shirt stencil with my silhouette. (Ya I use my Silhouette a LOT- click here if you are wondering what it is) I put a big yellow “3” on the shirt and let it dry, then I put her name on the shirt with a Tangled font. You can download the tangled font here. It doesn’t have all the characters but it’s the only one I could find! And luckily, it had all the characters I needed! 
 
 
I like to use whatever I can for multiple purposes. For her 3 year old pictures, she wore the same outfit from her birthday party and I even left the lantern decoration up and used it as a backdrop!

And of course, to top it all off, she needed a braid in her hair!


 I came across this awesome website where they show you how to do cutehairstyles for girls. They recreate a lot of the Disney princess looks. Here is a link to their youtube channel too.

Since my little girl is only 3, I didn’t want to drive her crazy with bobby pins and flowers falling out of her hair all day. Instead of making two micro braids and wrapping them around a bigger braid,  I made ribbon braids to wrap around her big braid.


I used ribbon that matched her hair color so it actually looked like her hair! I made it by tying ribbons around an elastic and braiding it, then I hot glued flowers right to it. When you are supposed to wrap micro braids around the larger braid I just wrapped the ribbon braids around it. For the flowers in the rest of the hair, I hot glued flowers to the tips of bobby pins and placed them in her hair. I was careful not to use too many flowers and hide the braid too much. 


At the end of the party, every one got a goodie bag filled with yellow and purple candies! It helped that my daughters birthday is right before Easter so I bought the candy with pastel wrappers and used the yellow and purple. I saved the blue and pinks for the Easter baskets :)